This guide explains how to convert a gerber file containing the paste layer of your PCB to a PDF that you can send to a laser cutter. The software required is all open source and will run on Linux, Windows, or Mac operating systems. I have used this procedure successfully to create stencils for fine pitch parts, such as 0.5 mm QFPs and 0603 metric (0201 imperial) resistors and capacitors. In addition, this procedure works for parts that are oriented 45 degrees.
To complete the steps in this guide, you will need to install the following software:
- gerbv – Available from http://sourceforge.net/projects/gerbv/files/
- Inkscape – Available from http://www.inkscape.org/en/download/
You will also need the paste layer of your PCB design in a gerber file. The creation of the paste gerber file is not covered in this guide because the process is different for each PCB design tool.
Complete the following steps:
- Convert the paste gerber file to an SVG file. The conversion is needed so the paste layer can be modified with Inkscape, a vector editing tool, in step 2.
- Start gerbv.
- Choose File -> Open layer(s). Select your paste gerber file, and click Open.
- Choose File -> Export -> SVG…. Enter a new file name, such as paste.svg, for the exported SVG file, and click Save.
- Close gerbv.
- Reduce the size of the paste area on each pad. Most PCB design tools that I have used define the paste area to be the same as the pad area. I have found that reducing the paste area helps prevent putting too much solder paste on the board. Too much solder paste will lead to shorts on fine pitch parts. Some tools, such as Altium Designer, have options in the library to specify the size of the paste mask. If you have defined a paste mask in your library to be smaller than the pad size, skip this step.
- Start Inkscape.
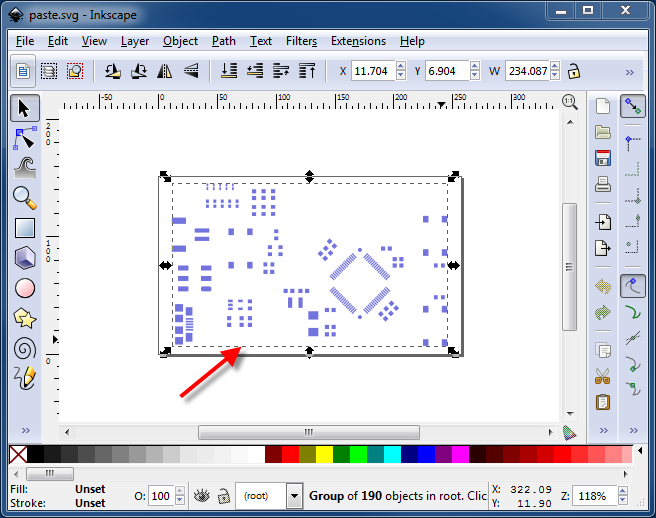
- Choose File -> Open. Select the SVG file you exported in step 1c, and click Open.
- Click once on any of the polygons. All of the polygons should now be selected as a group, as indicated by the dotted line around your design.
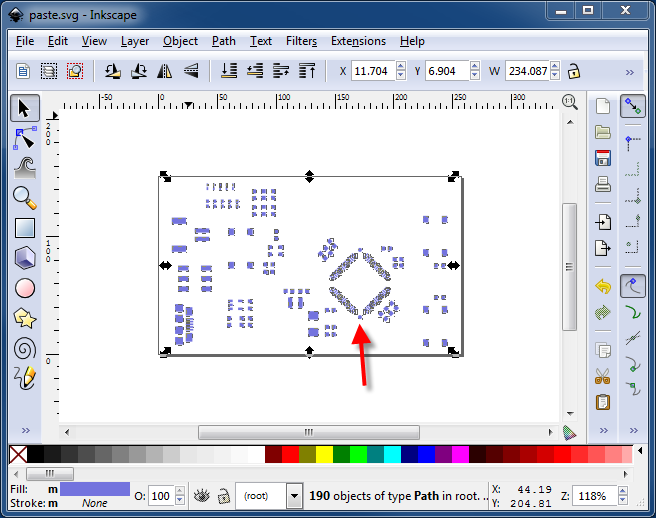
- Choose Object -> Ungroup. You should now see a dotted line around each individual object.
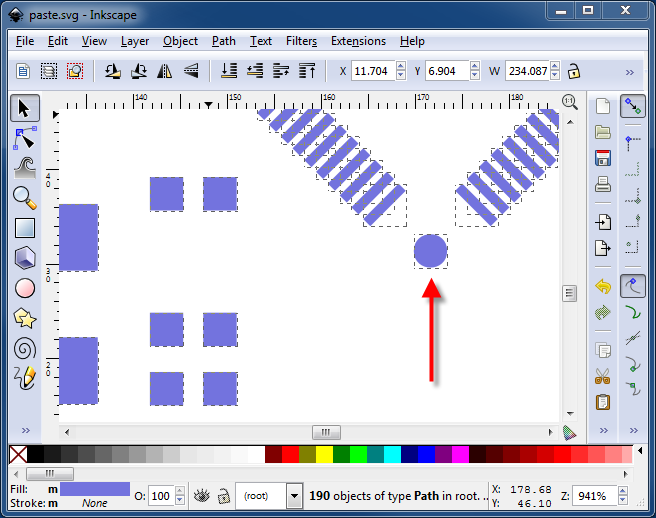
- With all objects still selected, choose Object -> Transform. Select the Scale tab. Enter 85% for the Width and Height. Make sure “Scale proportionally” and “Apply to each object separately” are checked. Click Apply.
- Choose File -> Save As. Change the file type to “Portable Document Format (*.pdf)”. Enter a file name, such as paste.pdf. Click Save.
NOTE: In this step, I save the file as a PDF instead of a SVG because Corel Version 15 (X5), which is the software used with the laser cutter that I use, cannot read the SVG files produced by Inkscape. The latest version of Corel, version 16 (X6), *can* read the Inkscape SVG files. Thus, if your laser cutter uses Corel X6, you can save your modified paste file as either a PDF or an SVG file.
- Send the PDF file to your laser cutter using raster settings. The polygons in the paste file are too small to be cut out of the kapton like you might cut out a pattern in acrylic. Instead, you will burn away the polygons by telling the laser to interpret the file as a raster image.The instructions below use CorelDRAW connected to a Helix 30W laser. The exact steps will vary based on your software and the model of your laser cutter.
- Place the kapton on the bed of the laser cutter.
- Press the Pointer button on the laser cutter to turn on the red visible laser pointer.
- Press the X/Y off button to release the carriage. With your hands, physically move the carriage to the point that will be the upper left point of the stencil.
- Press the Go button to re-engage the carriage.
- Open Corel Draw.
- Choose File -> Open. Select the PDF file you exported in step 2f, and click Open.
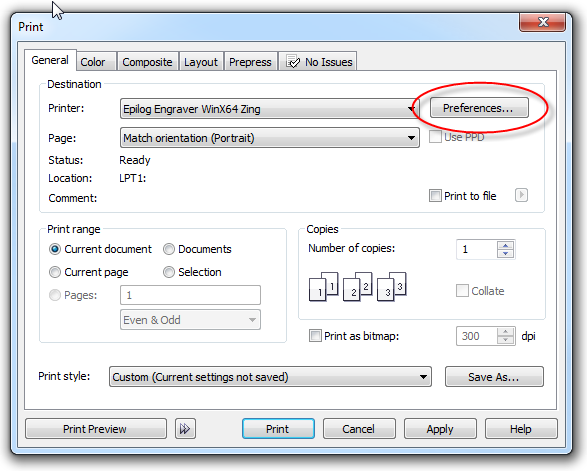
- Choose File -> Print.
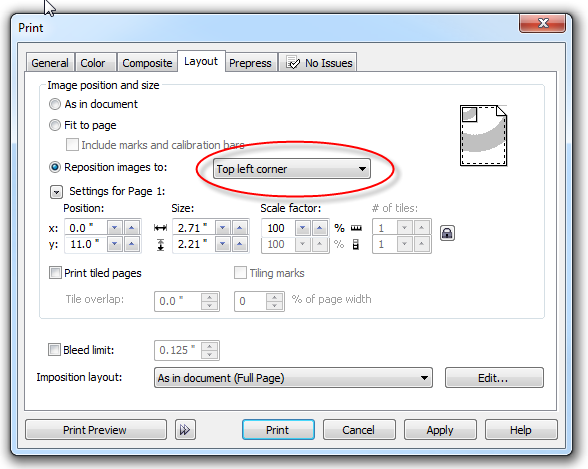
- Select the Layout tab, select “Reposition images to”, and select “Top left corner”, as shown in the following image.
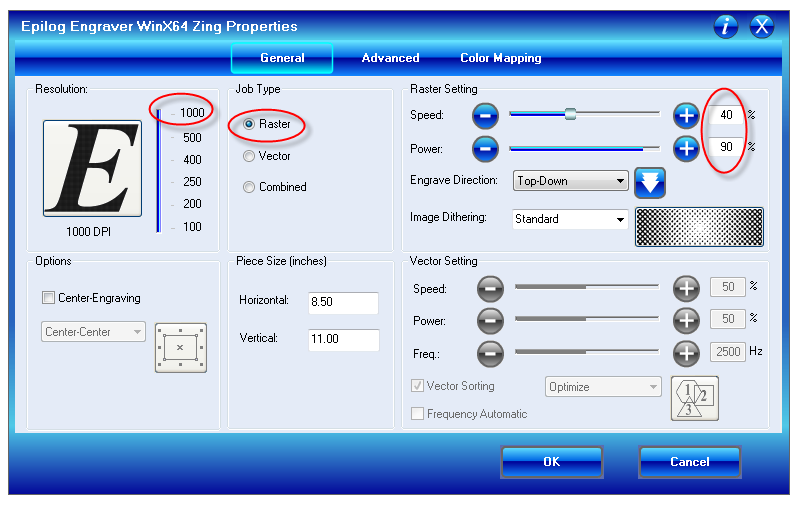
- Select the General tab, and click Preferences.
- Adjust the Resolution to the maximum. Set the Job Type to Raster. Set the Speed to 40% and the Power to 90%. If you are using a laser that is more than 30 watts, you can try increasing the speed slightly.
- Click Print.
- On the laser cutter, press Go.
After completing the steps listed above, your stencil will be burned into the kapton. The burning process creates a lot of charred debris. I use acetone on a paper towel to wipe the kapton several times on each side to remove the debris.
Here is an image of a stencil created with the process described above:
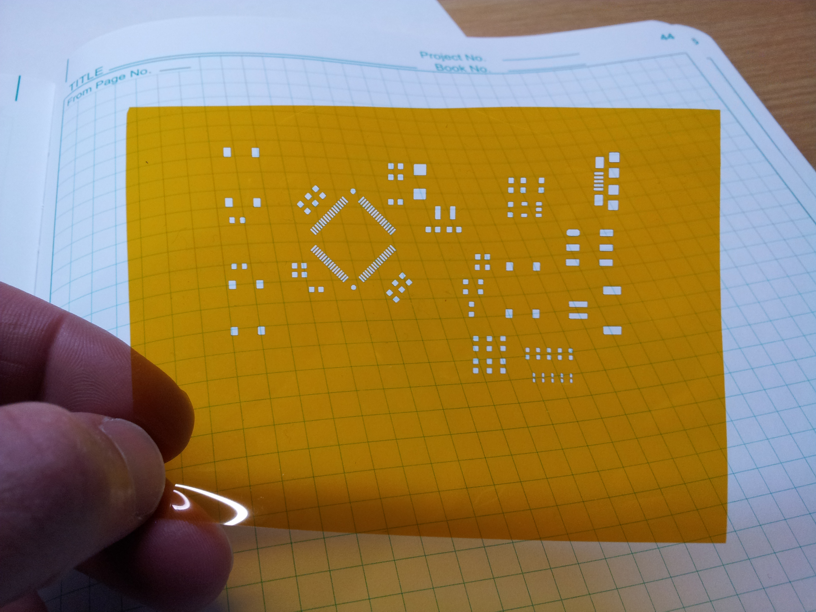
The pitch of the QFP in the image above is 0.5 mm. Most of the R & Cs are 0603 imperial. The five small parts in the lower right are 0201 imperial.
Please let me know if you have any feedback on this process by leaving comments below.
Can you tell me the thick of Kapton? Thank you.
Start with 0.002 inch thick Kapton. Here is a link: http://www.mcmaster.com/#2271k2/. If you find that you have too much solder paste, you could try using 0.001 inch thick Kapton.